RSS Posts
RSS Comments
Space For Sell
Showing posts with label Feedburner Help. Show all posts

Create and customize an animated banner that cycles through your feed's five most recent items. It's an easy way to promote your content anywhere you can place a snippet of HTML.


If you want to place it in your blog then follow the steps i tell you

1. Go to your feedburner page and log in your account

2. Then go to Publicize tab


3. Click "Headline Animator" from the felt navigetor
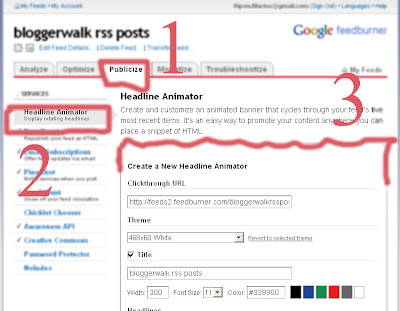


4. Customize it with using the number of fields

5. Save to activate the service.

6. In the next page You will select your blog type for exaple if you use blogger then choose it then click next. and it will be automatically placed in your blog.

Continue
Chicklet Chooser

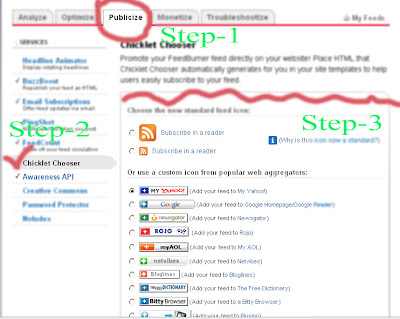
Promote your FeedBurner feed directly on your website! Place HTML that Chicklet Chooser automatically generates for you in your site templates to help users easily subscribe to your feed. see the bolow as an example

 Subscribe in a reader


If you want to place it in your blog then follow the steps i tell you

1. Go to your feedburner page and log in your account

2. Then go to Publicize tab

3. Click "Chicklet Chooser" from the felt navigetor


4. Choose the new standard feed icon from the list

5. Copy the HTML code for use in your own page templates Or you can directly place this code from here.

Continue
Awareness API

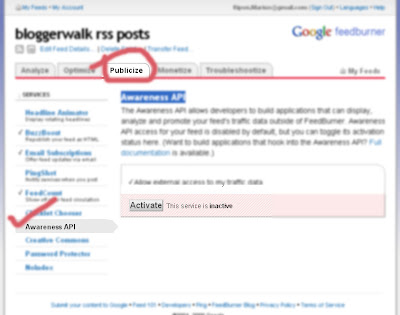
The Awareness API allows developers to build applications that can display, analyze and promote your feed's traffic data outside of FeedBurner. Awareness API access for your feed is disabled by default, but you can toggle its activation status here. (Want to build applications that hook into the Awareness API? Full documentation is available.)

1. Go to feedburner log is your account.

2. Then go to Publicize tab

3. Click Awareness API from the felt navigetor


4. Click Activate

Continue
FeedCount

FeedCount is another cool way to promote your feed. It is a dynamic graphic that always displays your feed's current circulation, as calculated by FeedBurner. Choose its color scheme and an animated or static appearance; it is yours to customize!feednurner then log in you gmail account. here is an example


1. Go to Your feedburner account

2. Then click Publicize tab

3. Now Click FeedCount from the left navigator bar

4. Select your Chicklet style


5.Click Activate to get the code.

6. Now you will place the code in your blog by selecting HTML/Java Script gadget


Continue
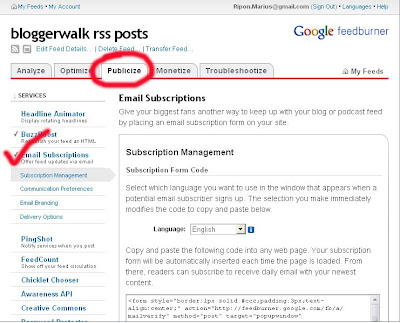
Give your biggest fans another way to keep up with your blog or podcast feed by placing an email subscription form on your site.


1. Go to feedburner log is your account.

2. Then go to Publicize tab

3. Click Email Subscriptions from the felt nevigetor

4. Now you customize the forms and copy the code but remeber if you use blogger then select "Use as a widget in blogger"


5. Copy the code then place it in HTML/JAVA gadget

6. Save the gadget.

Now If you want to place it in every single post but not is the home page then follow the steps

6. goto blogger account >> Layout >> Edit HTML click expand widgets

7. Search the below code by Ctrl + F

<data:post.body/>


8. Place the code after the above code with
<b:if cond='data:blog.pageType == &quot;item&quot;'>
<table border='0' cellpadding='0' cellspacing='0' width='100%'>
<tr>
<td><div align='center'><form action='http://feedburner.google.com/fb/a/mailverify' method='post' onsubmit='window.open(&apos;http://feedburner.google.com/fb/a/mailverify?uri=bloggerwalkrssposts&apos;, &apos;popupwindow&apos;, &apos;scrollbars=yes,width=550,height=520&apos;);return true' style='border:1px solid #ccc;padding:3px;text-align:center;' target='popupwindow'><p>Enter your email address:</p><p><input name='email' size='80' style='width:140px' type='text'/>
</p><input name='uri' type='hidden' value='bloggerwalkrssposts'/><input name='loc' type='hidden' value='en_US'/><input type='submit' value='Subscribe'/><p>Delivered by <a href='http://feedburner.google.com' target='_blank'>FeedBurner</a></p></form></div></td>
</tr>
</table></b:if>


9. Save it

Continue
Related Posts Plugin for WordPress, Blogger...